
Victorian High Country walks
Contents of this page:
I tend to only write track notes for routes that are not described in widely available guide books and most of these track notes have been written in response to requests.
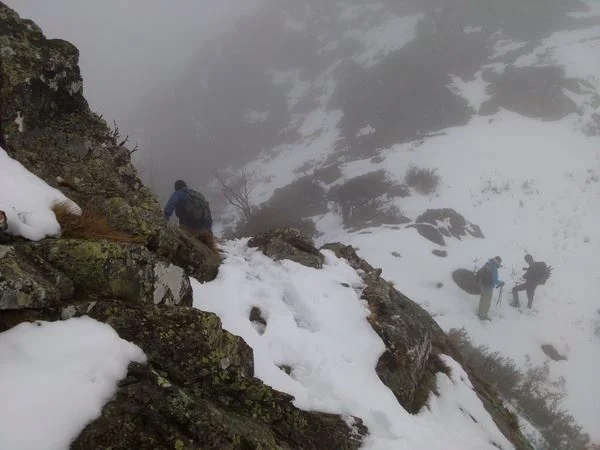
1. Mt Buller West Ridge circuit in winter
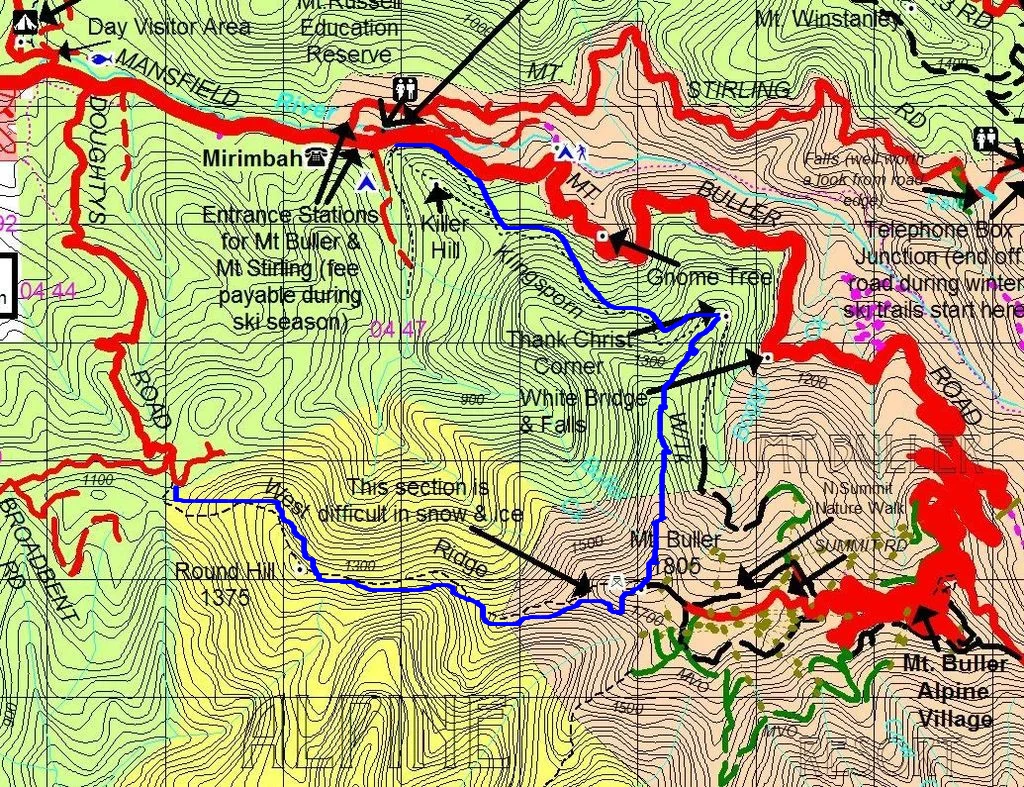
Mt Buller West Ridge circuit in winter. © David Sisson
I first posted this walk description in 2007 as it is one of the most rewarding circuits in Victoria and wasn't in any guide book. I've rewalked it and slightly tweaked these notes every few years. The route has subsequently appeared in Glenn Tempests's Daywalks around Victoria. Open Spaces, 2011 as a summer walk. © David Sisson. 2007 - 2014.
Difficulty
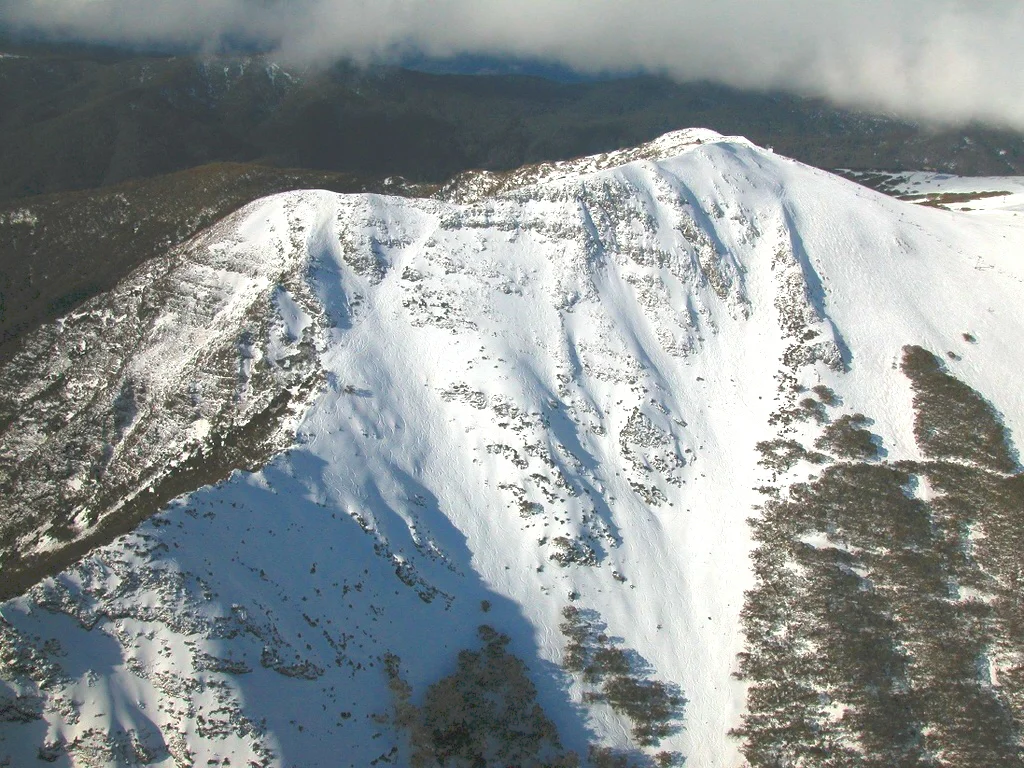
Aerial view of the Buller Chutes. Main Street is on the far left of the summit ridge. Photo John Eacott.
Distance: 11½ km, 7 hours. Firstly in winter this is a hard grade trip, in summer it is medium-hard. Parts of it are semi-technical and if you are not experienced and don't know what you are doing, the trip is potentially dangerous. In addition to the usual back country snow gear like a telephone, overpants, a good raincoat, gloves, goggles, warm clothes, warm hat, sunburn cream, torch, etc., you should be carrying cash or a credit card (in case you bail out at the ski resort), crampons and an ice axe (which are easily hired in Melbourne) and know how to self arrest using the axe. If you don’t, you may slip down an often icy 45 degree slope to the treeline. You should start walking well before 10.00. Don't start the trip if the weather forecast is not for fine conditions.
Access
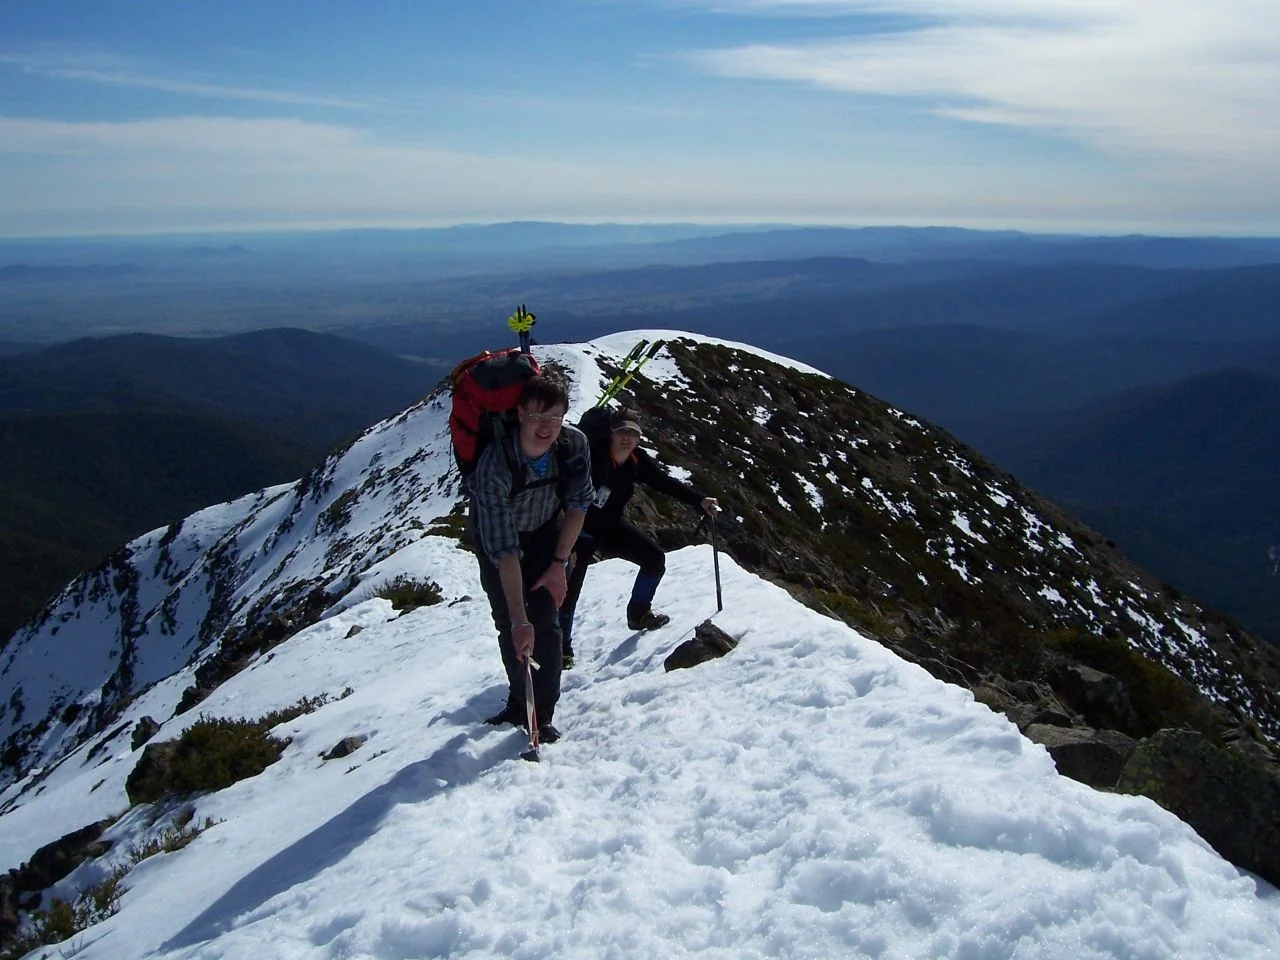
Late spring view of the two main hills and the summit ridge from Big Hill at the start of the walk. © David Sisson.
The trip involves a short car shuffle, so you will need two or more cars. From the town of Mansfield drive east on the C 320 to Mirimbah at the base of Mt Buller and leave one car under the trees near the toll booth. Squeeze everyone into the other car(s) and drive 2½ km back towards Mansfield. Just before you get to Sawmill Settlement, turn south into Doughty’s Road. Take this well maintained gravel 2WD road for 4 km to a road junction near the top of the ridge. The main road swings to the west while a minor road continues south. You will know if you have driven too far on Doughty’s Road if you get to a regrowing logging coupe. Either leave your car at the junction or drive along the minor road for 200 metres until you get to a bend. The start of the walking track is fairly obvious.
The walk / climb. Big Hill to Mt Buller
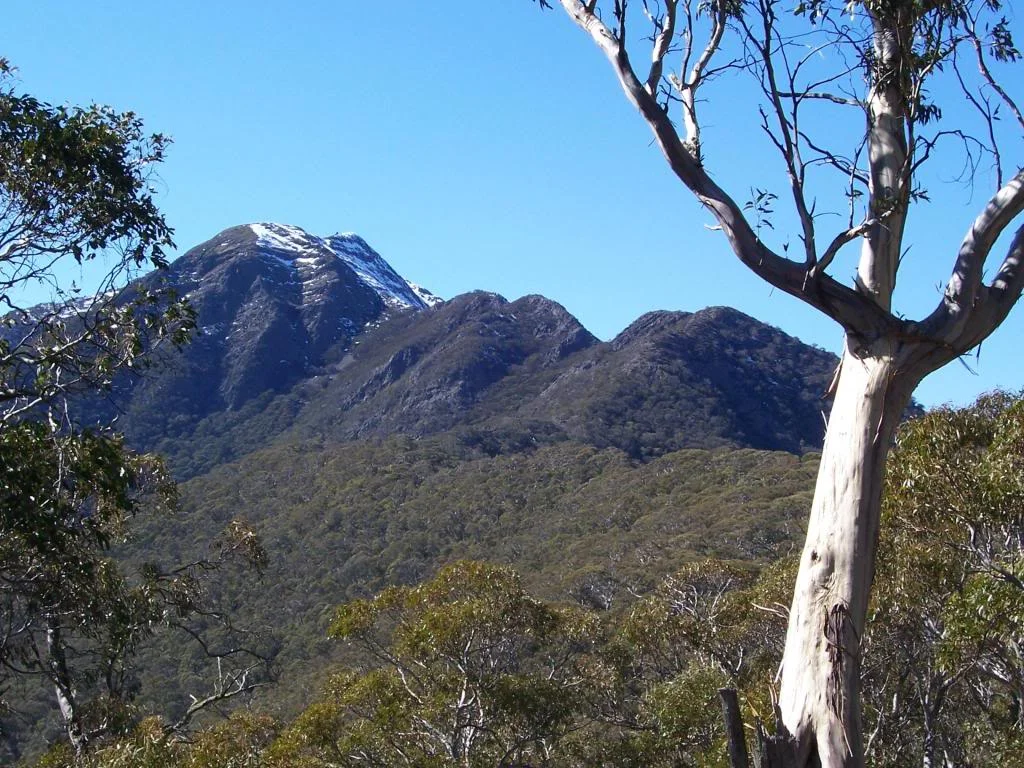
The first main hill in Spring after the snow on the northern side has melted. © David Sisson.
The track starts at a moderate grade and heads to the top of the ridge (be careful not to follow a false pad leading west), before heading east to the top of Round Hill. There is usually light snow here but the track remains fairly obvious. Take a breather here and a few photos of the West Ridge looming through the snow gums. Follow the track down the hill to a saddle and after a few undulations, the serious climb starts. There is a minor semi-cliff just below the treeline where the track is not always obvious, but if you lose the track, it tends to be to be south of the ridge line past Round Hill. Soon you climb above the treeline to the top of a moderately steep hill with a cairn on top. This is the last good resting place before the top, so take an early lunch here and appreciate the grandstand view of the south face.
Beyond here the route goes over a rocky hill which involves a few minor rocky scrambles. Much of the route is over loose shale and you do not want to wear crampons on loose shale, especially if it is covered with verglas. So unless the snow is reasonably deep, keep your crampons off and using your axe as a walking stick, proceed slowly and carefully. After this tricky hill, descend to an obvious saddle before the main face.
It should go without saying that if there is any danger of avalanches, (light fresh snow over ice or over packed snow with a hard surface) you shouldn't proceed beyond here. Instead go back to Round Hill.
Stop here and put on your crampons. Six point crampons (that do not extend to the heel) are adequate, if you have 12 point crampons you will need fairly stiff soled boots or the longer and more rigid crampons will slip off or break. Practice your self arrest technique, walk 50 metres and tighten your crampons. If it is early in the season and the snow is not well packed down or there is deep fresh snow, you could use heavily cramponed snow shoes with a fold up high heel, but only if conditions are not icy.
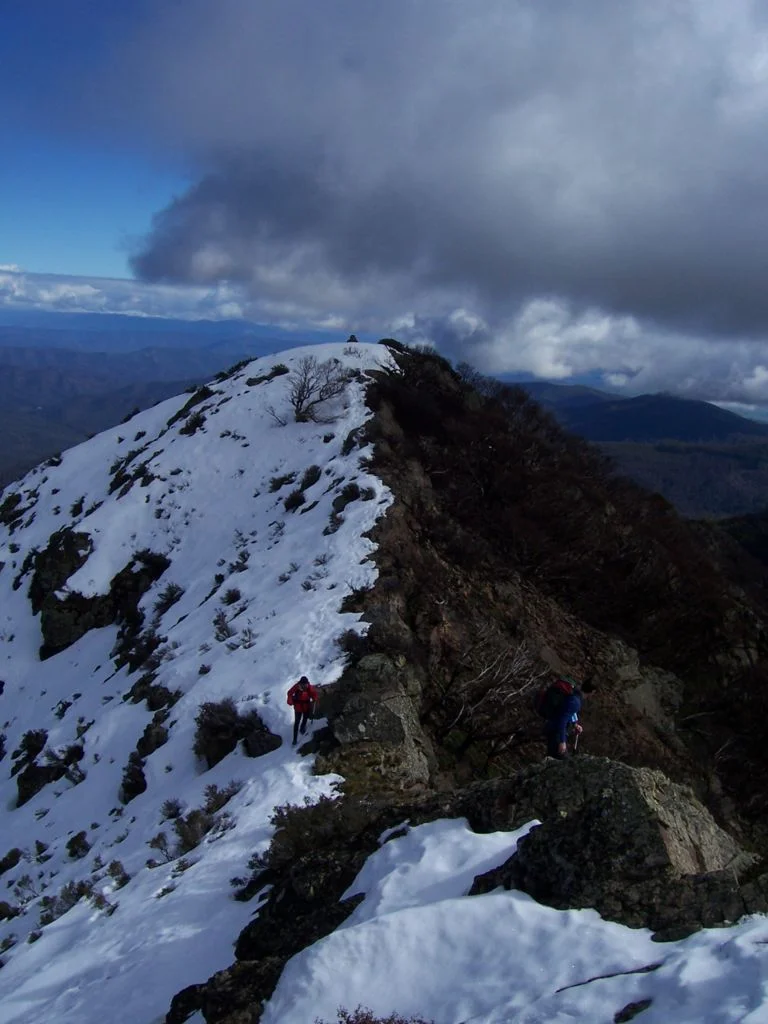
Descending the second, rockier hill, just before tackling the West Face of Buller. © D.S. 2013,
Contour eastwards towards the ski lifts, and you will soon get to an obvious route up a chute with the improbable name of Main Street where you may see some ski tracks. Climb up this chute to the top of the ridge. Usually the snow is well packed and the steep walk isn't too hard if you take it easy; but occasionally loose or wet snow can be waist deep making for very slow progress. From the top of the ridge it is only a few hundred metres along the narrow ridge to the summit. At the top, pause to take in the spectacular C shaped ring of snow clad cliffy mountains that almost surround Mt Buller, from Mt McDonald in the south to Mt Cobbler to the north east.
This is when you have to make a decision. If it is after 2.00, OR you are mentally or physically tired, walk over to Baldy, then walk parallel to the Holden Express chairlift down to the bus terminal in the town square. At the Buller town square, take one of the regular buses down to Mirimbah. The fare is about $25 each.
If you are planning to walk back to Round Hill from the summit, you should be aware that descending steep snow slopes is much more difficult than ascending them. You will probably have a few falls walking down any of the chutes, so make sure you have perfected self arrest using your ice axe.
The author on the summit ridge above the Main Street chute. In winter this area is under deep snow and can be very icy.
The Summit - McLaughlin’s Shoulder - Mirimbah
If it is before 2.00 and you are all still in good spirits and not feeling fatigued, head down McLauglin’s Shoulder. Take off your crampons when you start to encounter rocks shortly after the treeline, but keep using your axe as a walking stick. There are a few 1 or 2 metre high rocky bits where you should be careful not to slip, but nothing too hard. There is no track, although a faint footpad is usually visible in summer. You will occasionally see ancient metal markers nailed to trees to reassure you that you're on the right course. Just over half way down, about 1½ km after you walked past the top of a chairlift, the spur splits at a fairly flat and open grassy area. It is very important to take the right hand spur. The split is not obvious and it is easy to be over confident and end up going down the left hand spur. Make sure you are to the right of the centre of the ridge and that you can occasionally catch a glimpse of the valley to your right.
Soon you will be beyond the rocky and navigationally tricky bits and you will come across a series of beautiful flat steps that look like purpose designed campsites. After these, continue descending down the middle of the spur and you should come out exactly at Thank Christ Corner on the well maintained Klingsporn’s Track. This was built by graziers who aggisted their stock on the mountain in summer and was the main pack horse access for skiers at Buller before the road was built in the 1930‘s. There is almost no danger of walking over this obvious track without noticing it. In summer beware of mountain bikers who also use this track as they tend not to be on the lookout for walkers as they hurtle downwards.
Take another breather, turn left and walk for 3½ km towards Mirimbah. If you have taken the wrong spur, you will come onto the track about 1 km west of Thank Christ Corner. (This western route is steep with lots of logs to climb over and holes to fall into, so it pays to make sure you take the eastern spur.) The good track crosses a number of usually dry gullies and splits just before the end. The right hand route continues to gently contour downhill, the left hand route climbs to the top of the aptly named Killer Hill before dropping steeply to Mirimbah. Take the right hand route. It has been a long day and you will be knackered.
On the off track section it has been known for people to roll an ankle. Since the days are short in winter, any delay will mean doing the last section, (on a very good track), in the dark using torches. Make sure you are carrying them. At Mirimbah, send your drivers to retrieve the car(s) you left at Round Hill, while the non drivers huddle in the cafe drinking warm coffee. © David Sisson. 2007 - 2014.
2. Mt Feathertop: a brief description of all routes.

Walking routes on Mt Feathertop. The Great Alpine Road is coloured red.
Mt Feathertop is probably the most appealing peak in the high country of Victoria. It provides terrific hiking in summer and in winter it is a great venue for snow-shoeing, mountaineering and extreme skiing and boarding. But be careful, as it averages a death per decade. All deaths (so far) have been in winter and many have been due to not treating the summit ridge cornice with the full respect it deserves.
Maps. A decent map is essential when visiting Feathertop. The most useful and accurate map is Mt Feathertop - Hotham 1:30,000. 2nd edition. Rooftop, 2009. The 1:50,000 scale maps of the Bogong High Plains area published by Spatial Vision and Rooftop are also pretty good for Feathertop.
Walking routes up Mt Feathertop (Anti clockwise from the north.) Most of the mountain was toasted in the 2003 and 2006 fires and the regrowth in some areas is still quite thick, making walking off track difficult below the treeline. All tracks from before the fires have been restored except the Trout Farm - Stony Tops track (not shown). Parts of Champion Spur have been cleared, although there is still a lot of scrub on that route. © David Sisson
NORTH RAZORBACK.
Shown in Brown on the map. Relatively easy, but exposed. 4.1 km from the summer 4WD road head to the summit. 7.3 km from the winter gate at the end of the rough 2WD section of the road.
To get to the North Razorback, turn off the Great Alpine Road (B 500) just south of Bright at Germantown on the Mt Beauty Road (C 536). Cross the Ovens River and immediately turn south along Snowy Creek Track (aka Dungey's Track). If you're in a low clearance 2WD, park at the end of the freehold land and walk for about 4 hours. If you're in a 'soft roader' or 4WD, continue southwards, turning right at every main road junction (ignoring short logging tracks). Eventually you will climb up to Stony Creek Tops.
At Dungey Gap (1300 metres) you will find the seasonal road closure gate (locked between Queen's Birthday and Cup Weekend), and a large clearing that has recently been cleared of a blackberry infestation (Thanks Steve !). 200 metres north east of the road is a large metal fire water tank full of pretty rancid water and a small creek with good water which flows most of the year. (Don't rely on it from January to April.)
The road deteriorates from here, so walk the last 3.2 km unless you have a real 4WD. At the end of the road, it is only 4.1 km to the summit along the North Razorback walking track which continues over undulating ground for another 3 km . At the treeline the track fades to a footpad and is easily lost. But the steep 1 km route to the North Peak is obvious. At the North Peak find the track again and walk along the summit ridge to Mt Feathertop.
Map notes. If you have an older map, ignore the walking track shown between the North Razorback and MUMC Hut. Originally a route for droving cattle, it was rebuilt to transport material when MUMC Hut was being built but it has now been overgrown for 45 years. The ground the former track traversed is very steep and scrubby, so even if you are heading for MUMC Hut, it's much faster and easier to take the indirect route over the summit. The first edition of the Rooftop map also shows a walking track from the trout farm at the base of North West Spur to Stony Tops. This was in reasonable condition before the 2006 fires, but it has not been restored and is no longer maintained.
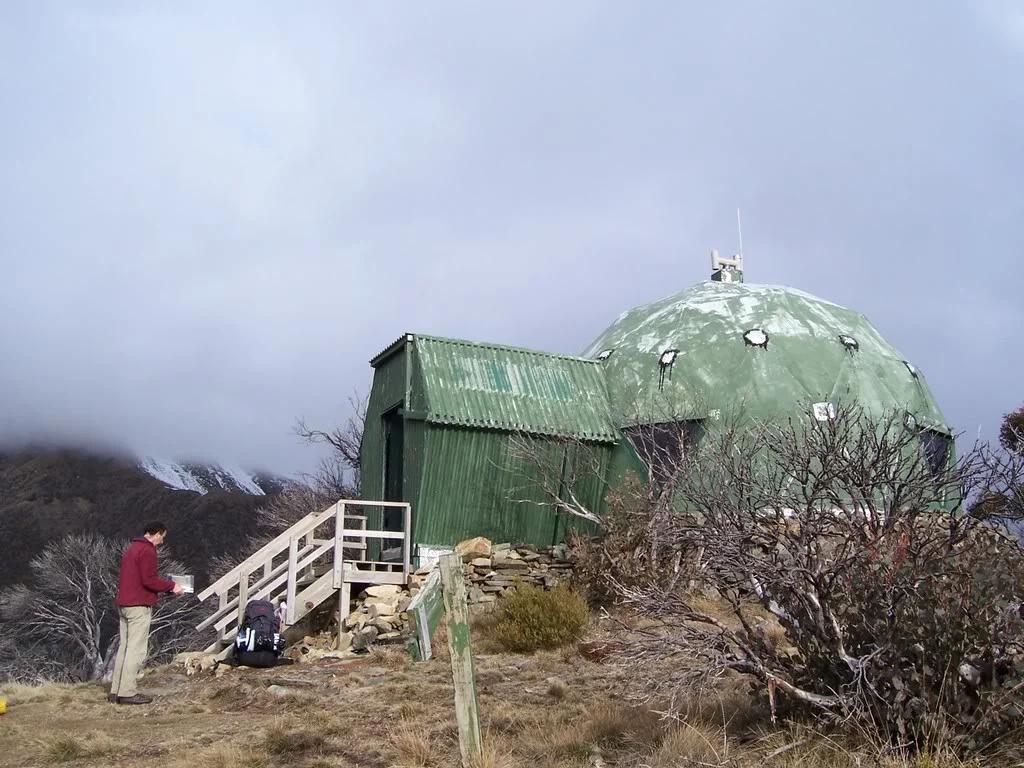
MUMC Hut on North West Spur. © David Sisson 2008.
NORTH WEST SPUR.
Shown in Orange on the map. A steep, hardish slog. Turn off the Great Alpine Road (B 500) onto Stony Creek Road 20 km south of Bright or 5 km north of the Harrietville general store. The road crosses the river and splits into a number of tracks, but follow the main track east for a few hundred metres and park your car.
Follow the dirt road along the south side of Stony Creek. Don't cross the creek before the walking track starts and you are well away from farmland. After an initial climb, the walking track descends to a creek with reliable water 2 km from the start of the track and then the serious climb begins. It is long and steep. Higher up there are a couple of spots where the track isn't always obvious, so pay attention to the route once you are amongst snowgums. MUMC Hut is 7.6 km and at least 3 hours walk from the car park. It provides a welcome break and is large, clean, and roomy. However as the stove has been removed, it is pretty cold, especially in winter. From the hut follow the relatively gently graded track along the ridge to the west face of the mountain. This short section passes a reliable spring and leads to a track junction half way between the summit and Federation Hut. While snow doesn't build up on the west face all that often, it is very steep and if you are following this route after a decent snowfall, be aware of avalanche danger a few hundred metres either side of the spring.
BUNGALOW SPUR.
Shown in Yellow on the map.The most popular route for overnight walkers. 8.2 km and 3+ hours to Federation Hut, plus another 1.8 km to the summit. The track was built for pack horses and tractors that serviced the Feathertop Bungalow, a hotel that used to operate near the top of the spur, so it's relatively easy going. The modern Federation Hut at the top of Bungalow Spur is large, clean, roomy and well insulated. In winter the stove will keep the hut warm all night, as long as both doors are kept shut.
Access. Drive to Harrietville on the Great Alpine Road (B 500). Just north of the bridge over the East Branch of the Ovens River, turn onto Feathertop Track and follow the road south east for 1 km. Park your car at the information board, just before the road turns north and crosses a creek.
It's easiest to think of the walk to Federation Hut as four sections of 2 km, each of which takes under an hour. The first two sections to Picture Point and Tobias Gap feature a winding climb on the side of the mountain, initially through tall forest and tree ferns, alternating with dryer areas of peppermint forest in areas that get more sun. In winter, light snow is usually found at 1,100 metres near the halfway point at Tobias Gap.

Federation Hut on the treeline at the top of Bungalow Spur. © D.S.
The third section is much straighter as the track stops zig-zagging and heads directly towards the hut. The end of this section is at a corner where a swampy stream crosses the track. From here. it is 1 km to the site of the Feathertop Bungalow, followed shortly afterwards by the site of Feathertop Hut. This flat open area is a good place to take a breather before the final kilometre along the snowgum lined ridge to Federation Hut. In winter this section is often covered in deep snow, but the route is usually obvious as it is fairly straight and regularly packed down by walkers and skiers.
The tank at Federation Hut is labelled unsafe to drink, however this is just Parks Victoria covering themselves against ambulance chasing lawyers, I've never heard of anyone becoming even slightly ill from drinking it's water. Be aware that it has been known to run dry in late summer, which may mean a 30 minute return trip down to the reliable spring near Feathertop Hut site.
From Federation Hut the track heads north east, joining the (southern) Razorback track after 400 metres. After another 400 metres the track across the West Face of the mountain to MUMC Hut diverges and the steep 1 km walk to the summit begins. In summer stick to the built track to help reduce erosion. In winter snow, stay back at least 4 or 5 metres from the top of the ridge to be safe from cornice collapse.
Note: Technically, the track only follows Bungalow Spur from near Tobias Gap. Off track notes for purists who wish to follow the full length of Bungalow Spur can be found in older editions of Tyronne Thomas guidebooks.
CHAMPION SPUR.
Shown in Green on the map. A difficult and rarely used route recommended for those who are not afraid of a little scrub bashing and who are looking for a new route up Mt Feathertop. The route follows an old river level forestry track from Harrietville before turning east to run straight up the middle of Champion Spur. This section of the track along the river is now partly eroded and overgrown, so it may be better to follow the Bon Accord track for 3 km and scrub bash down to the river before fording it and picking up the old track from there.
Once away from the river, the old track generally sticks to the middle of the spur. While it was not burnt in 2006/07 fires, a dozer was sent up it to clear access and beyond the road head, a 80 cm wide track was cut for the last 1,200 metres to join the Razorback walking track just south of the corner at grid 112 137. This track has not been maintained and is slowly becoming overgrown again.
BON ACCORD SPUR.
Shown in Blue on the map. 13 km from Harrietville to Diamantina Hut on the Great Alpine Road. A slog, steep in parts, but not too bad. From Harrietville the route initially follows an old mining track for 4½ km along the East Branch of the Ovens River that has been in continuous use for over 150 years. There is a bridge over the river, so crossing it is not a problem, but then the uphill part of the walk begins. This is the last water before the end of the walk, so make sure you fill your water bottles.
Alternating between steeper and more gentle gradients, the track climbs to the site of Bon Accord Hut. The hut was a staging post for pedestrians and the pack horses that used to service Mt Hotham ski resort in winter until road clearing began in the late 1950's. It was burnt in 2003 fires and Parks Victoria have vowed that it will not be rebuilt. With the loss of the hut, there is no water on this route past the river, so camping at the hut site means you must carry a lot of water. From the hut site, the track climbs very steeply for 1 km to the tree line before the gradient eases a little. It joins The Razorback at the top of Big Dipper Hill, 1 km north of Diamantina Hut on the Great Alpine Road.
THE RAZORBACK (SOUTH).
Shown in Purple on the map. 11 km, 4 hours each way. Long and dry (take at least 2 litres of water each for a return trip), but relatively easy going. The walks starts at Diamantina Hut on the Great Alpine Road, 3 km west of Hotham ski resort. A few minutes out, the track splits, the western branch goes over Big Dipper Hill, the slightly less obvious eastern branch takes an easier route, contouring around the hill. Both tracks rejoin at Big Dipper Saddle.
The track undulates northwards, sometimes above the tree line, sometimes just below it. But the route is generally pretty exposed and you shouldn't undertake it unless the forecast is for fine weather. In summer it is the easiest way to get to the top of the mountain, but in winter it is covered in deep snow and is pretty heavy going. For snow shoers, Bungalow Spur is a much easier route.
DIAMANTINA SPUR.
Shown in Pink on the map. The track starts at the West Kiewa River Road (accessed from Mt Beauty, but closed in winter). It climbs 4 km to join the Razorback track 3 km south of the summit. The route is shortish, but scrubby, steep and sharp with loose shale. The track does not appear to be maintained, parts were burnt in the 2006/07 fires.
EAST RIDGE AND NORTH EAST SPUR.
Shown in Olive on the map. Both routes descend from the North Peak of Feathertop. No tracks, but when the area was burnt in the summer of 2006/07, it opened a brief window when mere mortals could walk the routes. Both are ridiculously steep and walking down is preferable to climbing up them. As the scrub grows back, they are returning to their former status of being strictly for heroes only. Steep and scrubby with dense blackberries near the West Kiewa River.
A history of Mt Feathertop and it's most famous building can be found at the 'Mountain history' section of this site.
© David Sisson. 2011 - 2015.
3. Mt Bogong: a quick review of all routes.
Mt Bogong is a huge and impressive place. When you're standing on the high, exposed summit ridge, it's hard not to be aware that you are on Australia's highest free-standing mountain. To say the weather is volatile is an understatement, it really can change from a warm sunny day to a howling blizzard in under two hours. There are no roads and the mountain is not connected to any other peak by a high ridge, so if you want to get to the top, you will need to do a lot of uphill walking.
- Day walks. Most trips to Mt Bogong spend the night on the mountain. If you want to climb Bogong as a day walk, it's only possible via Staircase, Eskdale or Granite Flat Spurs. It will be a long, hard day, so leave EARLY and even in the warmest weather, you should at least take 2 litres of water, lunch, a warm top, a telephone, a hat and a quality raincoat (anything less will be torn to shreds by the wind or scrub). Probably the best day walk route is to ascend The Staircase and descend via Eskdale Spur. This route has the advantage that if night falls before you complete the walk, the last hour is on a 4WD road. Unlike the Staircase track, it is fairly easy to stay on the Mountain Creek 4WD track in the twilight.
© David Sisson. 2007 - 2015.
Working clockwise from the north, the routes up Mt Bogong are:
- The Staircase. A long steepish grunt, but a fairly good track, great views and a basic hut half way. The area above the treeline is steep, rocky and exposed to the worst weather in the state, so check the weather forecast before you attempt this route.
- Eskdale Spur. A slightly easier alternative to The Staircase with a reasonable track and a very good hut, although the track above the hut is also steep and exposed to equally severe weather. So long as you're experienced, the main drawback of this route is the hour long walk from the main carpark along the Mountain Creek 4WD road to the base of Eskdale, which can be a bit dull.
- Granite Flat Spur. Not often used, but quickest way to the summit if you have a 4WD. A 2WD will get you on an unsurfaced road (The Hollow Way, turn off the Omeo Highway a few km south of Mitta Mitta) to the track junction, where the gate is locked between Easter and Cup Weekend. In summer you can take the easy 4WD track to a car park, which is only a little over 1 km from Michell Hut on the treeline on Eskdale Spur.
- Mulhauser Spur. A former stock route. While it was once moderately popular, it became overgrown when grazing was banned, but the route has been cleared and it has again become popular (especially in winter) as the most direct and sheltered access to Cole Hut. However if you're aiming for the summit, this route can be rather lengthy.
- Long Spur. Access from Omeo Highway side. Easy-ish, but long, with only a few short steep bits. Allow a full day from Big River Saddle to Bogong's summit or Michell Hut. The run down logging hut on Long Spur was burnt in 2003, so there is no refuge before Cole Hut if the weather turns foul, although the route is mostly sheltered
- T-Spur. Fairly heavily used access from Ropers Hut on Mt Nelse. It has an okay track, but the climb is a bit of an effort and it's very steep near the Big River. Once Maddison's Hut site on the treeline is reached, the route becomes easier as it traverses the length of the delightful Camp Valley to the terrific Cleve Cole Memorial Hut. Most groups take a full day to walk from Ropers Hut to Cole Hut.
- Granny Spur/Horse Ridge. (Cairn Creek Hut to Tadgell Point near Cole Hut). No track, but a footpad had formed before the 2003 fires. It was a fun route for those with well developed bush sense and good navigation skills. It's a bit overgrown now and Parks Victoria has ceased to maintain the track from Cairn Creek Hut to Bogong Creek Saddle that runs parallel to the Big River, which is now completely overgrown. So overall, what was a medium grade walk is now very challenging.
- Quartz Ridge. A relatively easy going walk from Bogong Creek Saddle to the Hooker Plateau on a good track, although there are plenty of steep sections and it is necessary to spend a long time on the summit plateau exposed to whatever the elements throw at you. You can get to Bogong Creek Saddle via Mt Nelse and Tims Lookout or Spion Kopje and the Grey Hills, or the tramline which starts close to the Falls Creek Road. The track which used to lead from Bogong Creek Saddle to Cairn Creek Hut has become completely overgrown in the last decade and is now difficult to follow.
- Little Bogong. Very Hard, I've never heard of anyone going up, always downhill. To quote 'Sidetrack' "The scrub was so thick, we faced backwards and pushed our packs through the scrub". It is very scrubby, very steep (an average grade of 1 in 3) and has a few small 'clifflets' that you don't see until you fall down them.
One of the many delights of the mountain is Camp Valley between Cole Hut and Maddison's Hut site. The walking track has been rerouted to by-pass it and now goes through snowgums, but it is much nicer to stick to the scrub-free frost-hollow that parallels the creek. (Superb camp sites with plenty of firewood.) I'd also recommend the diversion to Howman's Falls if you have the time. © David Sisson. 2007 - 2015.
4. Mt Hotham and Dinner Plain day walks
There are a number of rewarding day walks near Hotham and Dinner Plain. Dinner Plain and the Hotham Resort Management Board have devoted a lot of resources to track construction and maintenance resulting in an excellent range of walks around these two towns on the Great Alpine Road. Links to walk guides to the area, mostly written by Andrew Swift, can be found at the track notes page on the Hotham website
Be realistic about your speed and ability and always head out with a pack containing an up to date map, lunch, a hat, 2 litres of water, a telephone, a warm top and a good raincoat that won't leak or tear in the scrub. Remember that alpine weather is very fickle, conditions can change from a sunny summer day to a blizzard in an hour. These are summer walks, winter conditions are very different.
© David Sisson, 2007 - 2015.
Dinner Plain area
Carmichael Falls. Grade: Medium. 2 km, 1 hour.
The walk starts from a signpost on the gravel road that marks the southern border of Dinner Plain. If you are staying in town, walk to the southernmost point of Big Muster Drive and head south down one of laneways, cross the fence and walk across the snowgrass for about 30 metres until you hit the dirt road. From the signpost, a good track descends for 1 km to a viewing platform. There are occasional muddy patches. In spring the flow of the falls is quite impressive, but it is a worthwhile walk at any time of year. Track notes and a map can be found here.
Room With a View. Grade: Easy. 3 km, 1 hour.
Named after Sir Noël Coward's 1928 song, featuring whimsical lyrics like 'come with me and leave behind the noisy crowd', this track heads north from Dinner Plain through snowgum woodland to a viewpoint with great views towards the Bogong High Plains, the Cobungra Valley and Mt Feathertop. The track starts at a small sign 100 metres east of the town entrance, over the Great Alpine Road from a large billboard. After walking 150 metres you will arrive at a picnic table overlooking a small dam. The Montane Loop track heads off to the east (your right), but keep going straight ahead to the dam wall where there is another track junction. The Dead Timber Track heads west over the dam wall, while the Room With a View track descends the dam wall and heads generally north through gently undulating snowgum woodland with occasional treeless areas.
After a while the track splits into a loop at a mostly treeless snow plain. It's probably a little easier to take the clockwise direction. The track continues through similar terrain before descending a hillside and contouring across to a seat. Take a break and admire the view before continuing along the track which climbs back up to the plain before rejoining the route you took on the way in. Map and notes on this link.
Brandy Creek Mine and the Cobungra River. Grade: Medium. 3 hours.
From Whisky Flat on the Great Alpine Road, locate the 4WD track heading north east. Walk for 1 km down to the Brandy Creek Mine. Take the time to explore the mine site. Miners diverted water along an aqueduct which flowed into a dam. They used this water to supply high pressure hoses which were directed at the hillside, eroding the soil which was directed through sluice boxes which collected the gold. Sluicing was the most destructive form of gold mining and the devastation is still apparent almost 150 years later. From the mine, descend fairly steeply along the old road to the attractive valley of the Cobungra River. After a break and taking time to look around, return to Whisky Flat the same way. A worthwhile hike, but not the most exciting walk in the area. Link to track notes and historical information.
Brandy Creek Mine, the Cobungra Valley and Swindler's Spur. Grade: Medium plus. 9 hours or two days.
Brandy Creek 4WD track – Cobungra River – Dungey’s Track – Dibbin's Hut – Swindler’s Spur – Mt Loch car park. A longer extension of the walk above which involves taking the footpad up the valley of the river and Swindlers Creek to Dibbins Hut and then up the walking track to the Loch carpark. To do this walk in a longish day, a car shuffle or taxi ride is needed between Loch car park and the Brandy Creek Track. Alternately you could camp at Dibbin’s Hut and walk back along the Hotham - Dinner Plain walking track that runs parallel to the Great Alpine Road.
Navigation is fairly straight forward, except for the section on Dungey’s Track in the valley. The track has become a little overgrown and the route is not always obvious. At the junction of the Cobungra River and Swindlers Creek, be careful to follow Swindler’s Creek for a few km before climbing up to Swindler’s Gap and descending back to the river. From there it is only a short distance to Dibbins Hut and the track degenerates to a footpad before disappearing entirely. However the snowgrass beside the river is easy going and the route is fairly obvious. From Dibbins it is a steep climb up the well maintained Australian Alps Walking Track to the Loch Car Park near Hotham.
Dinner Plain to Dead Timber Hill and JB Hut. Grade easy. 4km, 1 - 2 hours.
Take the walking track that heads north from the gravel road just west of the Dinner Plain town gate. Head towards Mt Hotham along a walking track north of the Great Alpine Road. Dead Timber Hill has a good view towards Hotham. Continue along the track, crossing the Great Alpine Road to JB Plain Hut. Explore the area before returning along the Hotham - Dinner Plain Trail that runs just south of the road. Notes and map.
Precipice Plain and Montane Walking Track. Grade: Easy. 9 km, 3 hours or Easy-Medium 11km, 4.5 hours. From Dinner Plain walk south east along the dirt road 'Dinner Plain track'. Precipice Plain Lookout has a great view over the rugged headwaters of the Dargo River. Return the same way or, for a slightly longer walk, on the returnn leg, divert on to the Montane Walking Track. Despite being a dirt road bash, the walk from DP to Precipice Plain through scenic snowgum woodland makes this a quite attractive walk. The return section along the Montane track traverses a combination of state forest and freehold land where mountain cattlemen continue to graze as they have since 1848. Track notes for Precipice Plain and Montane Walking Track.
Mt Tabletop. Grade: Medium. 10 km, 4 hours.
JB Plain Hut – Mt Tabletop (1593 m) – JB Plain Hut. From JB Plain car park on the Great Alpine Road, walk to the hut and then cross the open snowplain and pick up the walking track to the south west when the route enters a treed area. Initially the walk is through open snowgum woodland before a short descent to a saddle where water can usually be found in two creeks. The track then climbs to the very flat summit plateau of the aptly named Mt Tabletop. There are trees on top, but walk to the edge of the escarpment for some nice views. Return the way you came. Track notes and a historical background can be found at this link.
Mt Tabletop, Mayford and Precipice Plain. Grade: Hard, 10 hours or two days.
JB Plain Hut – Mt Tabletop (1593 m) - hill 1426 – unnamed scrubby spur – Mayford town site – 4WD track – Precipice Plain – Dinner Plain – JB Plain. A hard, serious walk, that usually takes two days, but a with an early start, a fit and experienced group can do it in 10 hours. Expert navigation is required on the 7 km off-track section from Tabletop to Mayford and the scrub that has regrown since the 2003 and 2013 fires is fairly dense. The walk can be shortened by an hour or two by starting at JB Hut and leaving a 4WD at Precipice Plain.
Hotham - Dinner Plain Trail. 12 km (one way). Easy to medium. 4.5 hours.
Parallels the Great Alpine Road between the two towns. Starting at The General, the trail heads down Davenport Drive before following a route that is mostly just south of the road. Built as a cross country ski track, to me, it's not an especially great walk, especially when there are so many good tracks in the area. However it's promoted by both towns and seems to be fairly popular.
© David Sisson, 2007 - 2015.
Hotham Heights area
Mt Loch circuit: two huts, two spurs and Victoria’s 5th highest mountain. Grade: Medium-Hard. 8 hours, 21 km..
Loch Car park – Derrick Hut – Swindlers Spur – Dibbins Hut – West Kiewa Valley – Machinery Spur - Red Robin Mine – Mt Loch summit, descending via Raven's Haven - Loch Carpark.
My favourite harder walk in the area; a nice diverse circuit for fit walkers. It's probably best to do the walk anti-clockwise as it allows a better appreciation of Mt Loch (and a traverse of the mountain) and most of the latter part of the walk is on a 4WD track which can be followed in the dusk if the group is delayed. Detailed track notes for this walk excluding the diversion to Raven's Haven, (the craggy south face of the summit area) can be found in: John Chapman Day walks: Victoria. 2nd ed., 2011. Pages 180 - 184.
The Huts Walk: Mt Loch, Derrick Hut and Spargo’s Hut. Grade: Medium. 5 hours, 11 km. OR Medium - Hard. 8 hours, 21km. Loch Carpark – Mt Loch (1876 m) – Derrick Hut – Spargo’s Hut - Swindlers Creek - Blue Ribbon - Davenport village. Good track notes are available by following this link to the Hotham Resort Management Board website.
Notes. From the Mt Loch car park on the Great Alpine Road, follow the gravel road past the top of several chairlifts for 3.5 km to the walking track up Mt Loch. Take in the superb 360 degree view and walk back along the road for 1 km to the Alpine Walking Track snowpole line. Follow the track to Derrick Hut. After a break head back 500 metres to snowpole 84 and head south on The Huts Walking Track over the hill to Spargo's Hut. If you stay on the track, navigation should be easy, but if you lose the track, it is important to go over Golden Point (the hill between Derrick’s and Spargo’s). The area to the south and west of Golden Point is a huge blockstream and the rock hopping takes hours!
From Spargo's Hut you have the option of returning the way you came, or following the track on a steep descent to Swindlers Creek, with the option of a 1.5 km diversion to Silver Brumby Hut. Then an almost as steep ascent to the Great Alpine Road passing across the Blue Ribbon ski run. From there it is a 3km walk through Davenport and Hotham Heights to the Loch car park. Link to track notes on the Hotham website.
Mt Hotham. Grade: Easy. 1 hour
Mt Hotham (1863 m) can be climbed from Hotham Heights by following the Summit chairlift and continuing along a 4WD track. An alternative shorter walk to the top (which is a bit steeper) is to follow a track from Diamantina Hut on the Great Alpine Road.
Davenport village and Hotham summit circuit. Grade: Easy - Medium. 3-4 hours, 10 km.
An interesting and diverse walk taking in snowgum woodland, two mountain tops and an opportunity to look at the lodges at Mt Hotham. One of my favourite easy-ish walks in the area, although it is not in any guidebook or brochure.
From the car park between Wire Plain and Mt Little Higginbotham, walk along the unsurfaced road that passes to the south of Little Higgy. When buildings come into view, this road becomes Davenport Drive, the main street of Davenport Village. Follow the road to the General Hotel and then walk up the ski slopes next to the Big D chairlift or follow a gravel road just to the south of the ski slope. At the top of the lift, follow a track past some water tanks near the top of Mt Higginbotham and descend the walking track to the area around Lawler's apartments, taking the street down to the Corral car park. Then walk up the slope next to the Summit chairlift and follow a rough road that heads west for 1 km to the top of Mt Hotham. On the return trip, divert over the Great Alpine Road on the Hull Bridge, past Zirky's cafe and head towards the bottom of the Road Runner chairlift. Turn left (south) and follow a gravel road across the ski slopes which joins the Great Alpine Road just past the Blue Ribbon chairlift. Then walk along the main road for 100 metres to rejoin Davenport Drive and follow it back to your car. If you still have plenty of energy near the end of the walk, the short climb up the signposted walking track to the top of Little Higginbotham is a scenic way to finish the walk. This is a nice, not too challenging walk which passes two cafes that are usually open in summer.
Mt Feathertop via the Razorback. Grade: Medium Plus 9 hours, 22 km..
Diamantina Hut – The Razorback – Mt Feathertop (1922 m) – Razorback – Diamantina Hut. Many walkers want to climb Victoria’s most spectacular high peak and provided visibility is fine, this a straightforward walk without any navigational difficulties. While most of the walk is not difficult, it is quite a long haul and water may not be available at Federation Hut (30 minute return sidetrip), so start before 9.00 and carry at least 2 litres of water. If transport can be arranged, a more interesting return from Feathertop is via Bungalow Spur to the car park at Harrietville. This is a very popular walk and the route is described in the 2011 editions of both John Chapman's Day walks Victoria and Glenn Tempest's Daywalks around Victoria.
Cobungra Ditch track: Brandy Creek Mine to Davenport. Grade Medium, 4 hours, 13 km, ONE WAY.
A pleasant winding track that follows an aqueduct which once diverted water from Swindler's Creek to the mine. Click this link for excellent track notes on the Hotham website
The Twins. Grade: Medium Plus. 4 hours, 10 km..
A nice circuit walk to a rarely visited mountain, this enjoyable walk deserves to be more popular. Mt St Bernard Hospice site – Wangaratta Ski Club lift – Alpine Walking Track – The Twins (1703 m) – overgrown 4WD track – water point – Mt St Bernard.
It's best to do this walk clockwise as the AWT is easier to follow heading up hill on the steep walking track section and fairly reliable water is available later on.
Mt Blue Rag and the Blue Rag Range. Grade: Medium, 5 hours.
Dargo High Plains Road – Mt Blue Rag (1679 m) – Blue Rag Range highpoint (1718 m) – Dargo High Plains Road. While this walk is mostly on a 4WD track, it is one of the most scenic routes in the area.
© David Sisson, 2007 - 2013.
5. Australian Alps Walking track: a summary
This popular track extends from the suburbs of Canberra to Gippsland in Victoria. To walk it's entire length takes most people about two months, but it also provides a good basis to build interesting circuit walks.
The 'official' route bypasses many of the highlights of the High Country, unbelievably excluding most of the Main Range of the Snowy Mountains, as well as other interesting places such as The Cobberas. Needless to say, this curious bureaucratic definition of the track's route is almost universally ignored.
The 'standard' route of the track is usually defined as the one described in John Chapman and John Siseman's excellent guide Australian Alps Walking Track: Walhalla to Canberra. 4th ed. John Chapman, 2009. Updates are available at Chapman's website. A briefer alternative guide that follows the 'official' route of the full track can be found at the back of John & Lynn Daly's Take a walk in Kosciuszko National Park, 2010.
Many years ago the Victorian section of the track was marked with friendly yellow diamonds at eye height. Some are still visible and they are a useful indication that you're on the right route in places where the track is not obvious. They were replaced by pastel blue-green markers at ankle height. Needless to say, these low level camouflage signs are impossible to see, even if you are looking for them. Most recently parts of the route have been marked with yellow triangles at knee height. However with post fire regrowth many are not visible. so good navigation is more important than ever. Finally, parts of the track have been designated wilderness zones and track markers have been removed. So in some areas where the route is not obvious (such as between the summit of The Viking and Barry Saddle) navigation can be very tricky.
If you're doing the whole 660 km length of the track in one go, don't overestimate your likely speed and make sure you allocate yourself some decent breaks with a couple of days staying at a ski resort to give your body and mind a rest from walking. Thredbo and Falls Creek have a good range of accommodation and cafes open in summer, although Hotham can be pretty quiet in the off season (The General pub is usually open), as most permanent residents live 10 km along the road at Dinner Plain where there is always at least one hotel, a cafe and a small supermarket open..
If you are considering an extended walk incorporating part of the AAWT, here is a quick assessment of sections of the track from north to south.
You can have a fun time around the ACT / NSW border by creating a loop via Cooleman Plain, Blue Waterholes Old and New Currango - Oldfield's Hut - Mt Bimberi and beyond.
Kiandra to Thredbo is one of the best sections of the Australian Alps Walking Track. it usually takes a relaxed 6 - 7 days, but if you're a bit quicker there is lots of scope for side trips and variations to extend it as long as you like. Best of all, access is easy at both ends, so it's possible to use buses or hitch hike. A slightly shorter version is to start the walk at Mt Selwyn, or to drop down the Whites River corridor to Munyang instead of going all the way to Thredbo, although this option misses the Main Range and it's lakes, which are the highlights of the walk.
Thredbo to The Cobberas can be a rewarding hardish walk, especially if you peak bag The Pilot and all five peaks on the Cobberas Range, lots of steep stuff, scrub and off track walking, but you would need to either spend two days walking back to Thredbo along a 4WD road or arrange a pick up near Native Dog Flat to the south of the Cobberas.
The Cobberas to Mt Wills is mostly dull, boring and unrewarding. Navigation around Johnnies Top is occasionally difficult. In short, don't bother unless you are a completist and this is the last section of the AAWT that you haven't done.
Mt Wills / Mt Bogong / Bogong High Plains / Hotham. Mostly glorious country. One of the best sections of the AAWT. Lots of scope for variations and side trips to make the trip as long as you want.
Barry Mountains. Long, fairly dull and it is not always easy to find water, especially from January to April. However the difficult and steep climb from Barry Saddle to The Viking is a ripper and the sort of thing that most people would find challenging, both physically and navigationally.
Mt Howitt - Mt Buller area. The third of the classic sections. You could do the Howitt - Viking circuit (4 days) or walk entirely on the AAWT from Mt Speculation to Mt McDonald (the section between Mt Clear and McDonald is rocky and scrubby, but navigation isn't too hard). A reasonably challenging multi-day circuit could be: Buller - Stirling - King Spur - day long side trip to The Razor and Viking - Speculation - Howitt - Magdala - Bluff - 8 Mile - off track up Little Buller Spur.
Mt McDonald to Stronach's (North of Baw Baw). The second worst section of the track and best avoided. Almost all 4WD tracks surrounded by dull woodland or scrub-bash from hell stuff (especially around Mt Easton).
Stronach's Camp - Baw Baw Plateau - Walhalla. Quite wonderful (in a discreet, mostly understated way), but only three days long and it's not possible to do a circuit walk, so it would be necessary to arrange a pick up. In summer Mt Baw Baw Alpine Resort management will run an 11 passenger mini bus between the resort and Walhalla via the South Face Road for around $200, so this would be a good option for a group.
In summary, the best parts of the Australian Alps Walking Track are: Kiandra to Thredbo, Wills to Hotham, the Howitt - Buller area and The Baw Baw Plateau to Walhalla. © David.Sisson. 2008, 2013.
View counter including an earlier version of this page that was on a different website.